In the modern world, internet speed has become a basic necessity that is required both at home and at work. As an indispensable constituent in the setup of such a network, Cat6 Riser 1000ft is no exception. This article goes through the step-by-step installation procedure for the Riser-rated Cat6 Ethernet cable. So if you want to install a network that is super-flawless, read this blog.
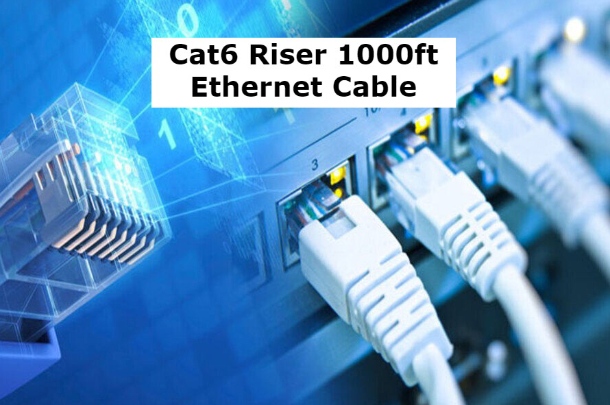
Cat6 Riser 1000ft Ethernet Cable
A Cat6 Riser 1000ft is a high-performing, high-quality network cable to be used essentially indoors. They look great installed vertically or risers.
Ideally suited to support Gigabit Ethernet and other bandwidth-intensive applications, the ideal speed for the transmission rate would be well-suited for their applications.
The “Riser” designation indicates that this cable is constructed to be able to withstand harsher conditions, thus appropriate for spaces where smoke and other toxic gases can be contained in case of fire.
Basic Equipment and Supplies
Prior to installing anything, the following shall be collected;
Cat6 Riser 1000ft Ethernet cable; this is the most important part of the installation as well as being the backbone of your network.
RJ45 connectors; these connectors will terminate the ends on the cables and connect them to different devices at the network.
Crimping tool: This special tool is used for crimping the wires inside the cable down into the RJ45 connectors firmly.
Wire stripper: It is required to remove the outer jacket and individual pairs of wires from the cable before termination.
Cable tester: This tester checks for the integrity of the cable and proper termination of the cable.
Ladder or step stool. Depending on your installation environment, you will, at some point, need to access higher areas with a ladder or step stool.
Wall fish or cable puller. If you are looking to push the cable through walls, then you will find a wall fish or cable puller quite handy in helping pull the cable through the cavity.
Preinstallation Planning
Plan Cable Route: Cable routing must be planned with caution considering all existing infrastructures and obstacles. This should mainly target the desired locations for the network outlet to avoid unnecessary complications during installation.
Mark the Route: Use a pencil or a marker to mark clearly where you would like to put the route on walls, floors, or ceilings. This will act as a guide when you are actually installing and prevent any damage to the walls or floors themselves.
Necessary Permits: If you are inclined to dig holes in the walls or ceilings, you would need necessary permits from your local building authority. In such scenarios, it is advisable that you seek the right kind of permits so that you do not flout local requirements and hence face any form of litigation.
Mounting the Cat6 Ethernet Cable
To get the desired length Cut the Cat6 Riser 1000ft Cable using a cable strip/ strippings to cut the cable to any desired length. Once you cut the cable, make sure the cut is clean and even so as not to pierce the inner conductors of the cable.
Strip the jacket layer Strip off the jacket layer of the cable, but be careful as removing extra jackets expose your wires to specific amounts of damage.
End Terminate: Ensure that there is follow through either on T568A or T568B wiring standard in terminating the end with RJ45 connectors. Make sure that it can be properly and securely connected using a crimping tool and the wires go into the connector, so it does not cause a signal interference due to improper contact.
Test the Cable. The cable will be tested using a cable tester in order to ascertain whether it is in good condition and has proper terminations. Thus, there will be no malfunctioning or faulty sections of the cable that will be connected to other network devices.
Cable Mounting
Choose Mounting Methods: For installation environment, suitable mounting methods have to be chosen. They include cable clips, raceways, or staples.
Consider the length of the cable, nature of the surface on which mounting is happening, along with aesthetic requirements.
Secure the Cable Mount the cable securely to walls, ceilings, or floors using the chosen methods. Be certain that the cable is not kinked or twisted since any of these could considerably affect signal transmission. Keep a consistent distance between the mounting points to avoid excessive stretching of the cable.
Connecting to Network Devices
Locate Network Devices Identify which network devices (router, switch, computer, etc.) you will connect the cable to. Make sure all of the devices are turned on.
Connect the Cable: Take one end of the cable that has been terminated. And then connect it to the respective port on your network device. Then connect the other end to the RJ45 jack on your wall plate or termination point. Make sure connectors are extended well and there is no loose contact.
Troubleshooting Cat6 Riser 1000ft
If after installation you experience failed connection issues then proceed with the following troubleshooting steps:
Check Cables and Connections: Ensure that all the connections are tight, and have the RJ45 connectors properly crimped. Loose or faulty connections interfere with signal transmission.
Cable Tester: Pass the cable through a tester to test the integrity of the Cat6 riser cable. This can help trace the area from where the problem emanated.
Check Network Settings: The first setting to check is that of the network on your devices. Any of the devices may not function well if not properly set.
Consult a Professional: If you are not sure of how to fix the issue, then consider employing a network technician. That way you’ll find out what really is wrong with your network as they will make an expert diagnosis.
Conclusion
Follow these requirements, and you can install your 1000ft Cat6 Riser Ethernet cable properly. Plus you’ll get a stable and high-performance network. Wise planning, using the proper tools, and testing the cable according to all parameters could ensure excellent performance. With a well-installed Cat6 Riser 1000ft, you can enjoy fast and efficient internet connectivity for your personal and professional needs.